
티스토리 뷰
Redux 없는 Vanila JS로 간단한 코드를 살펴보겠습니다.
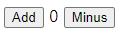
화면에는 이렇게 버튼 2개와 span 태그로 이루어져 있습니다.
우리는 버튼을 누를 경우 span 태그에 값이 바뀌게 됩니다. 아무 문제는 없지만
Redux를 함께 사용하면 코드의 변화가 어떻게 이루어지는데 보겠습니다.
저는 vs code를 이용하며, nodejs를 설치 후 터미널에 명령을 적습니다.
1) npm install redux // yarn을 사용하는 경우 yarn add redux
2) js 파일 상단에 import {createStore} form "redux";
설치와 import를 끝냈습니다.
우선 Store는 data를 넣는 곳이며, state라고 부릅니다
State는 application에서 바뀌는 data를 의미하는 것을 알아야 합니다.
리덕스에는 createStore라는 function (함수) 가있고,
store 가 하는 일은 기본적으로 data를 넣을 수 있는 장소를 생성합니다.
리덕스는 data를 관리하는데 도움을 주기 위해 만들어졌습니다.
버튼을 눌렀을 때 count 값이 +1 이 되거나 -1 이 되게 도와주는 것입니다.
일단 1) data를 넣어줘야 하고 , 2) data를 store에 저장해야 합니다. 3) store 에는 reducer라는 함수가 필요합니다.!
reducer는 함수이며 data를 modify (수정) 해주죠!

console.log(countStore.getState()); 해보면
hello라는 값을 얻을 수 있습니다 countStore에 state에는 reducer 가 return 한 값이 들어있다는 것을 확인할 수 있습니다.
위에서 말했듯이 reducer는 data를 수정할 수 있는데, data는 유일하게 reducer를 통해서만 수정할 수 있습니다.
수정을 하기 위해 선 action을 사용해야 합니다.
action 은 redux에서 function을 부를 때 사용하는 두 번째 parameter , 혹은 argument입니다.
action 은 reducer와 소통할 수 있는 유일한 방법!

*잘못된 부분이 있다면 댓글 부탁드리겠습니다*

'Redux' 카테고리의 다른 글
| React-Redux 삭제 방법 2 (추가글) (0) | 2022.02.28 |
|---|---|
| React-Redux 사용방법 (0) | 2022.02.26 |
| React-Redux 삭제 방법 1 (0) | 2022.02.26 |
| Redux state 에 올바른 데이터 추가방법! (0) | 2022.02.26 |
| Redux (state 변화를 감지하는 subscribe 함수 ) (0) | 2022.02.25 |
- Total
- Today
- Yesterday
- Scanner 와 BufferedReader 차이
- e.getMessage()
- java전역변수
- java최대값최소값
- e.printStackTrace()
- mapDispatchToProps
- 클래스변수 인스턴스변수 차이
- redux
- Heap Area
- Method 영역
- nexLine
- 오버로딩
- java 예외
- java문자열배열
- react-redux
- java 배열 출력
- java멤버변수
- Java
- e.toString()
- 클래스영역
- 자바
- List Set 변환
- 기본형타입
- map set 변환
- Dispatch
- java숫자형배열
- publi
- final 변수 초기화
- Stack Area
- set
| 일 | 월 | 화 | 수 | 목 | 금 | 토 |
|---|---|---|---|---|---|---|
| 1 | 2 | 3 | 4 | 5 | 6 | |
| 7 | 8 | 9 | 10 | 11 | 12 | 13 |
| 14 | 15 | 16 | 17 | 18 | 19 | 20 |
| 21 | 22 | 23 | 24 | 25 | 26 | 27 |
| 28 | 29 | 30 | 31 |